
Privacy statement: Your privacy is very important to Us. Our company promises not to disclose your personal information to any external company with out your explicit permission.

2-1, For the PC, click "
start"--"control panel
"--"Networ
k and Sharing Center"or directly click the
bottom right sign to open the control panel as the following:
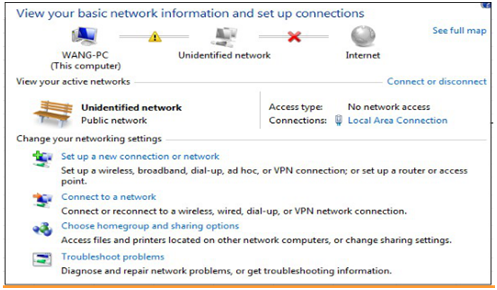
2-2, Click the "Local Area Connection", then click the "properties" to open the properties dialog as the following:

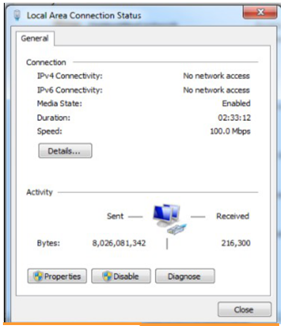

2-3, Twice Click the "Internet Protocol Version 4(TCP/IPv4)" to open the properties dialog. As the following:
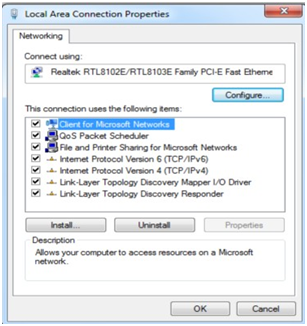
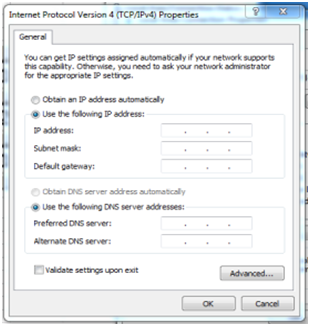
2-4, In the Internet Protocol Version4(TCP/IPv4) dialog,choose "Use the following IP address", get Manual IP address
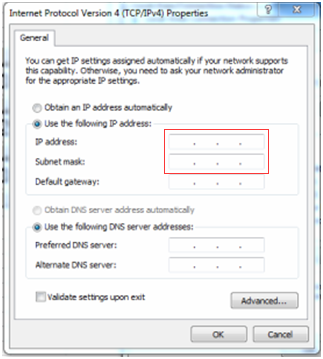

3- Set the IP address for the artnet controller
3-1, Open the ArtnetSet software
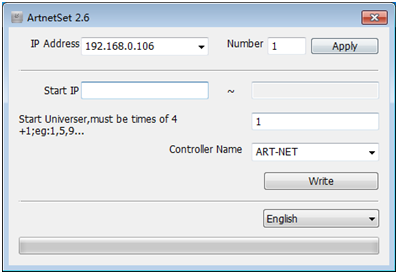
NOTES:
IF all the words are previewed as error codes, please download the English language
pack from the Microsoft's homepage and install it on your computer.
3-2, Choose the language of the software .(English or Chinese)
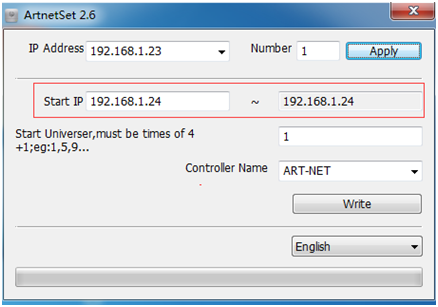
3-3, Set the number of the controllers, and press the button of Apply:
Eg: When the number of controller is 1. the starting IP of Artnet controller is same as the
ending IP.
Eg: When the number of controller is 2, the following IP of Artnet controller will automatically
generate.(Each Artnet controller has one IP address.)
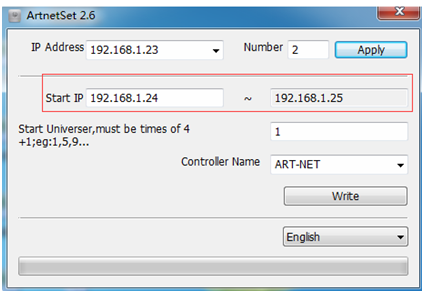
3-4, Set the starting universe number of the Artnet controller. The system default is 1.
3-5, Set the name of Controller.
The system default is ART-NET.
3-6, Press the button of Write.
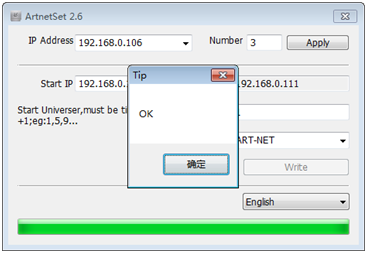
3-7, The LCD display of each Art-net controller will show the IP addresses. Check the IP whether it is
according with your settings.
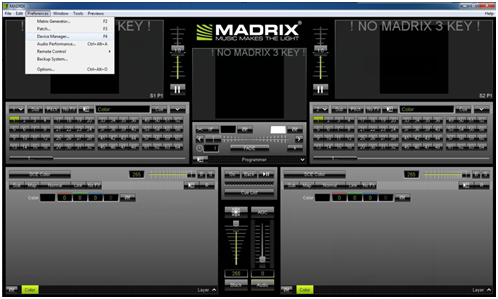
4- Open the madrix software
4-1, select the button in turn of "Preferences"--"Device Manager" to enter the window of
"Device Manager"
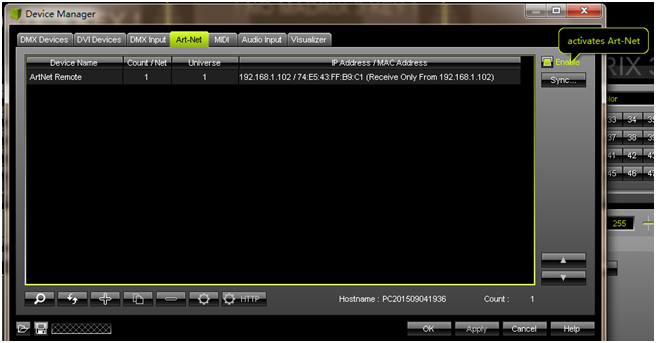
4-2, In the "Device Manager" window, click "Art-net". Click the button "Enable"
(remark: if the Art-net could not start, the internet network settings should be checked;
redefine the IP address)
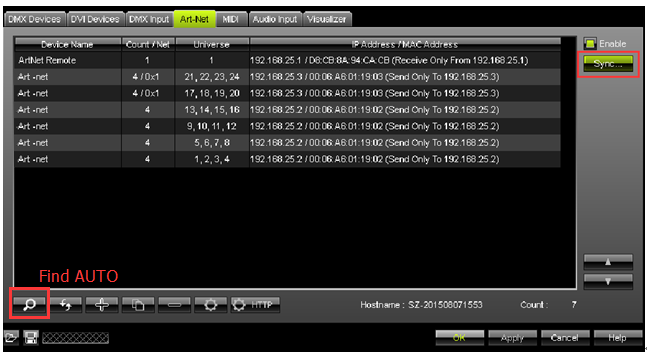
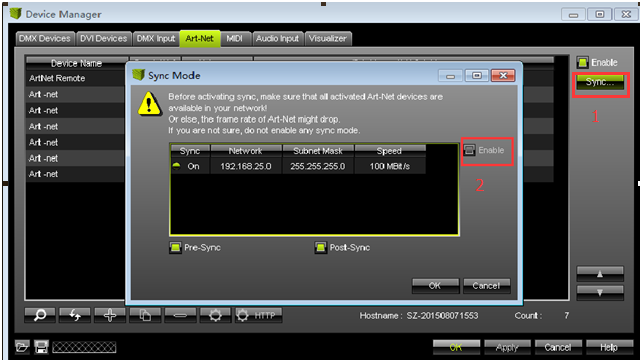
4-4, Click the button "Sync". Then the "Artnet Sync Options" window appears.
In the window, click the button "Enable", "Pre Sync" and "Post Sync". finally select "OK" to finish
the setting.
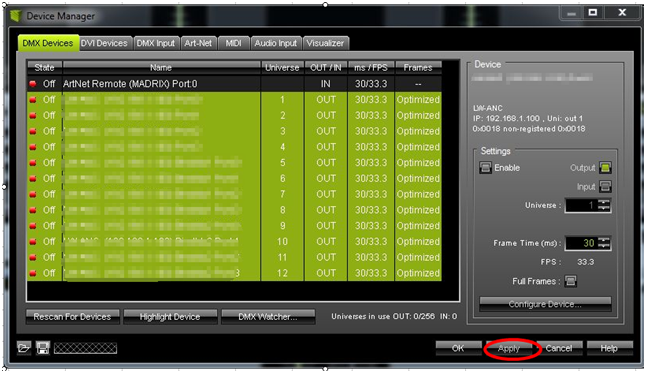
4-5, In the "Device Manager" window, select "DMX Devices".
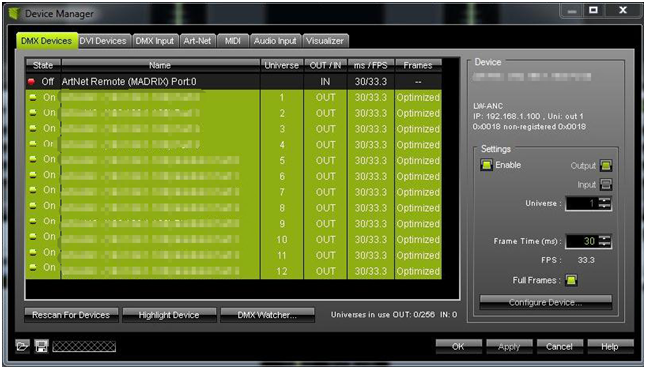
select all the universes, click the button" Enable". Then click the button "Full Frames"
finally click" Apply" button to finish the output parameter settings.
Remark: Change the "Frame Time(ms)" within 25<F ≤1000(F is "Frame Time(ms)",1000 is the
software factor maximum number. Here the default no.is 30 and don't need to change.)
4-6, Click the button "OK" to finish the setting.
September 30, 2024
September 23, 2024
Email ke pemasok ini
September 30, 2024
September 23, 2024
June 05, 2024
March 27, 2024

Privacy statement: Your privacy is very important to Us. Our company promises not to disclose your personal information to any external company with out your explicit permission.

Fill in more information so that we can get in touch with you faster
Privacy statement: Your privacy is very important to Us. Our company promises not to disclose your personal information to any external company with out your explicit permission.